Storefront FAQs


Website Insights
Designing for Your Store
Successful Designs
Uploaded Images
Specialty Films
Name & Number
Unapproved Designs
Edit Vs Customize
Public Domain
Uploaded Images
Specialty Films
Name & Number
Unapproved Designs
Edit Vs Customize
Public Domain
Marketing Your Store
This FAQ section covers all the basic storefront info you'll need. Choose a link in our accordion menu to get started!

How are designs ranked in the gallery?
Designs are ranked based on popularity. We have written an algorithm using a special formula involving clicks and conversions and some other tricks. The design rankings are updated once every 24 hours.
If you want your design to rank higher in the gallery, we recommend promoting it as much as you can. The more clicks and purchases it gets, the higher it will rank.
For more information on promoting, check out the
Marketing Your Store
section of these FAQs.
Can I upload many images at once?
Yes. Click on My Account and then My Uploaded Images. You will see an upload button on this page. You can upload up to 20 images at once (with a max file size of 5 Megs for each image).
Keep in mind, you don't need enormous images for printing on shirts. 1,000 pixels (wide or tall) should probably be big enough. To ensure high quality printing, please don't upload tiny, low-res images.
Also, a quick tip: if you are in the design center (on a non-mobile device), and you click the Upload Image tab, and you feel like you have too many images, you can hover over an image and click the little blue "x" that appears in the corner. If you had already saved a design with that image, your design will not be affected. It will still work just fine.
However, if you delete your image from the My Account > My Uploaded Images page, then the image is permanently deleted. If your upload image tab is slow in the design center, we recommend just click the little "x" in the corner of the image within that tab.
Can I disable the "Customize It" link?
Storefront owners have the option to turn off customization for the designs in their store. To enable or disable this feature follow these simple steps:
- Log in to your storefront account on Customized Girl
- Navigate to the "My Storefront" page
- Select the "Edit Info" button
- Scroll down and the option will be available under your store avatar.
- Enable this box to allow customers to customize any design in your shop like always. Disable it and customers will no longer be able to customize your designs with their own text, art, and images.
Are you also adding designs to the gallery?
Yes. And to be honest, as of the writing of this FAQ section, no one has ever asked us this question. But we wanted to put this information here in the spirit of openness and transparency.
Customized Girl launched in 2004, and we started building a gallery of designs in 2007. Since 2007, our gallery of customizable designs has been very important to our growth. Until May 2014, all of the designs in our public gallery were created by us, in-house. In May, we opened it up, and started allowing store owners to add designs to the gallery as well. Then we closed it again in mid-2017. All gallery designs are currently created in-house.
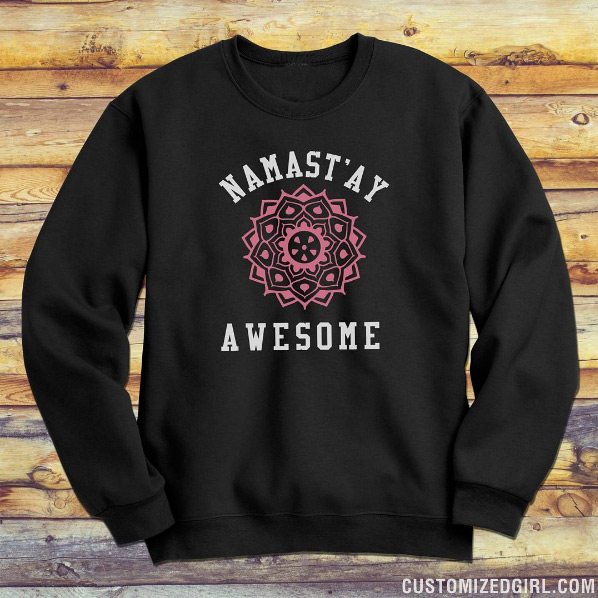
What does a successful design look like?
In general, the designs that seem to sell the best are super clean and crisp and readable and simple and great. They have these characteristics:
- big, bold, all caps text
- one color, maybe two
- one piece of easily recognizable, crisp art
- maybe an element of humor
- maybe a rhyme
- not very many lines of text
- immediately readable / recognizable

Any tips for uploading great images?
Your image should be large, but it doesn't have to be HUGE. Specifically: any images that are 1,000 pixels in height or width should be fine. They don't need to be any larger than 2,000 pixels in height or width. (It's okay if they are HUGE, but it might start to slow down the design center if you have too many HUGE images.)
Don't simply take images from the internet to which you do not own the rights. The only exception to this rule is artwork from the
public domain
Try to avoid uploading small thumbnail images. These do not result in a high quality print. Also, please do not take small thumbnail images and blow them up to be 1,000 pixels or larger. This simply doesn't work. If it is a small, low quality image, and you make it bigger, it will be large, low quality image.
If you're trying to upload many images at once, check out our other FAQ called
Bulk Image Upload.
Your image mode should be set to RGB. For example, in Photoshop, you can go to Image > Mode and see various options, including Grayscale and Indexed Color. If your image is set to one of these other modes, it will cause issues with your design.
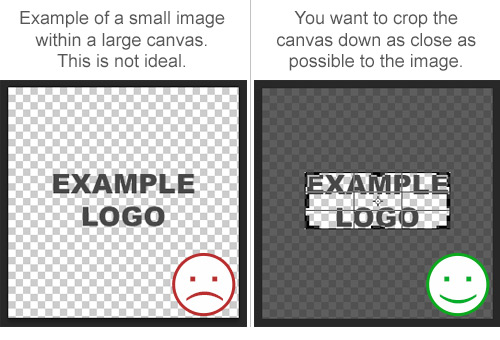
If you are having trouble moving your image up against the design boundary, or if you think you should be able to make it larger, it might be due to your canvas size. Let's say you have a large image, but your logo is small and centered within that file (aka within the canvas). In that case, your image will butt up against the boundary, but not the small logo within it. Be sure to crop your canvas tightly to the image itself. See the example below.
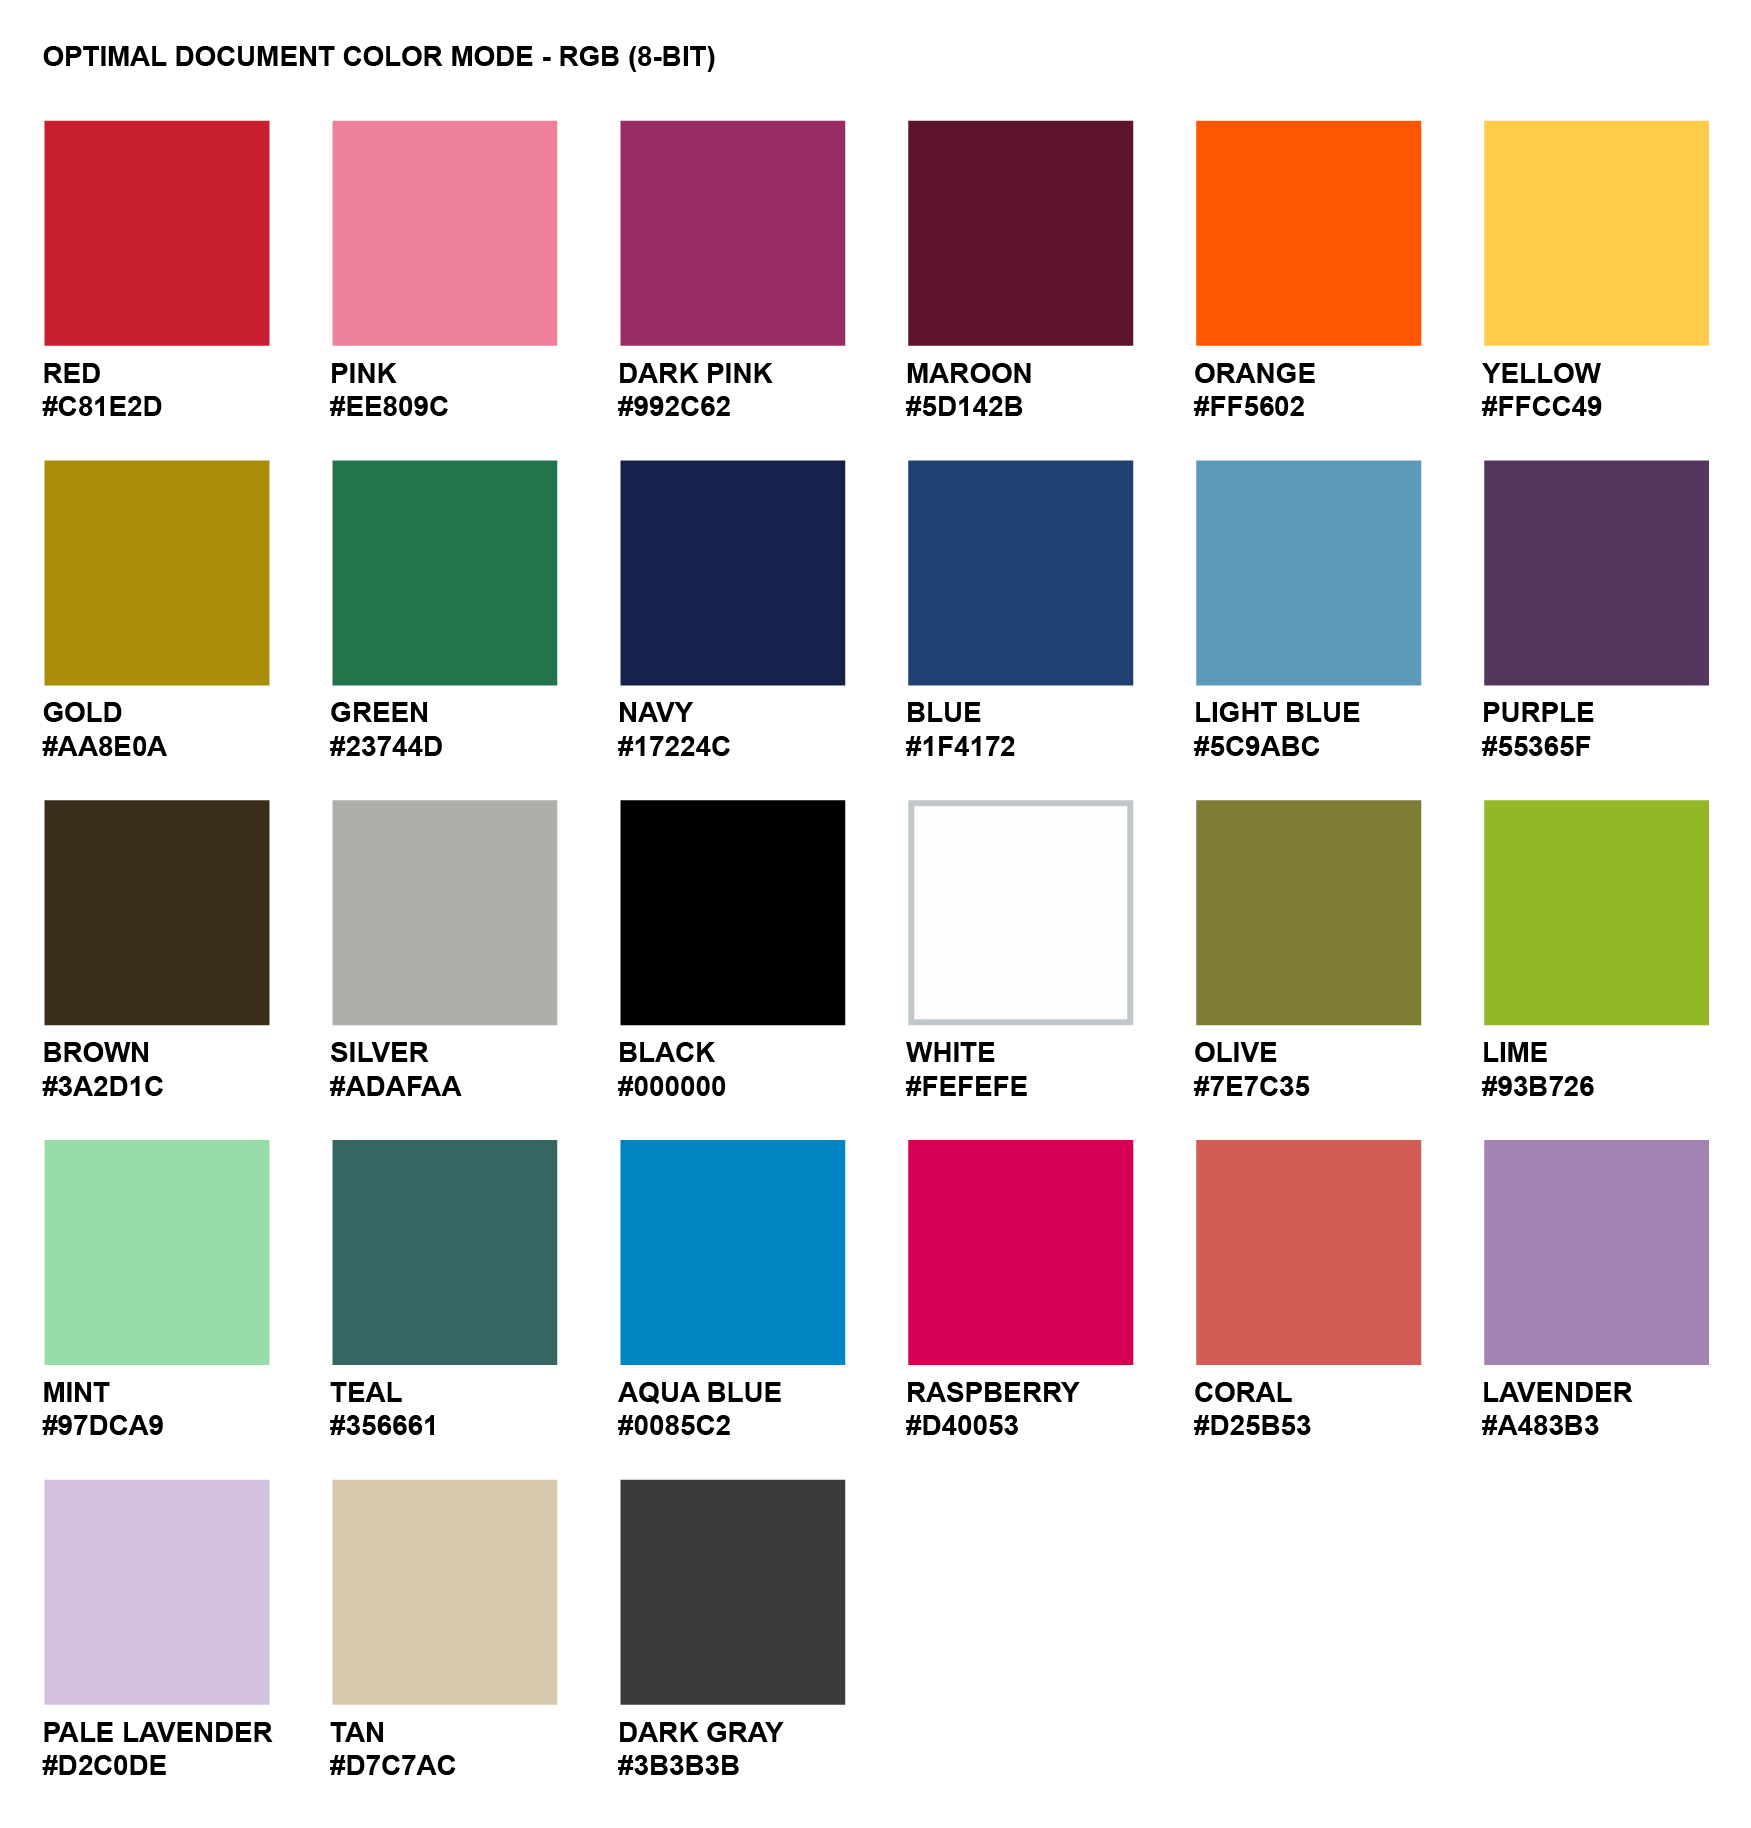
 Let's say you want to create an uploaded image that will match the color of the text and art from our design center. You can simply copy the copy the image below and paste it into your image editing software (such as Photoshop).
From there, you can use your eyedropper tool to select your color. (These are the colors from our text color drop down menus.) Now, you can match your image to our text! Perfect if you want your customer to be able to add a custom, matching element.
Click for a larger version:
Let's say you want to create an uploaded image that will match the color of the text and art from our design center. You can simply copy the copy the image below and paste it into your image editing software (such as Photoshop).
From there, you can use your eyedropper tool to select your color. (These are the colors from our text color drop down menus.) Now, you can match your image to our text! Perfect if you want your customer to be able to add a custom, matching element.
Click for a larger version:
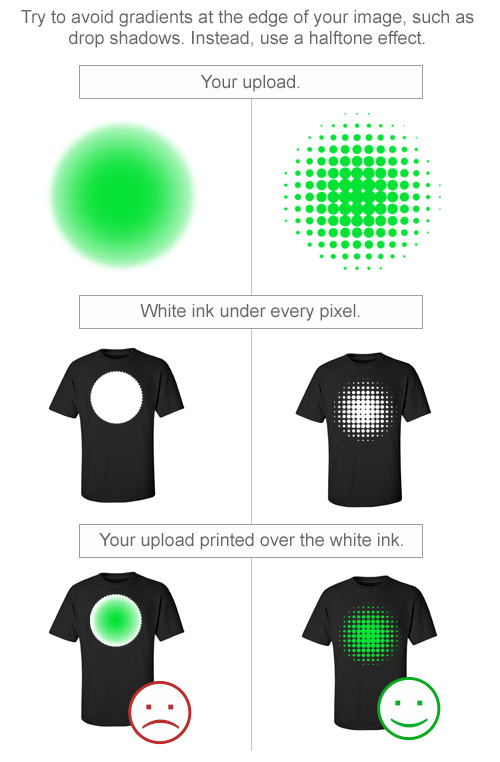
 Avoid drop shadows with gradients or any images that "blend" into the color of the garment. This is especially true if you are printing on a dark item. On dark items, we need to lay down a layer of white ink first and then lay down the ink from your design. The white ink covers the exact area of your design, but when the design "fades" into the fabric, you end up with something like a small white halo around your art.
If you really want to create the effect of a gradient blending into the item color (like a gradient shadow or glow effect), please use a technique called
Halftone. That link contains a detailed explanation, but we can elaborate here: Halftone consists of a series of dots that usually go from big to small. The dots create the illusion of a gradient, while maintaining clean edges so that the bottom layer of white ink gets laid down in the appropriate places. Most graphics programs (like Photoshop and Illustrator) have halftone tools.
Avoid drop shadows with gradients or any images that "blend" into the color of the garment. This is especially true if you are printing on a dark item. On dark items, we need to lay down a layer of white ink first and then lay down the ink from your design. The white ink covers the exact area of your design, but when the design "fades" into the fabric, you end up with something like a small white halo around your art.
If you really want to create the effect of a gradient blending into the item color (like a gradient shadow or glow effect), please use a technique called
Halftone. That link contains a detailed explanation, but we can elaborate here: Halftone consists of a series of dots that usually go from big to small. The dots create the illusion of a gradient, while maintaining clean edges so that the bottom layer of white ink gets laid down in the appropriate places. Most graphics programs (like Photoshop and Illustrator) have halftone tools.
 If you need any help with creating a great image, please email CGstores@eretailing.com.
How does the clone tool work?
The clone tool is a great way to quickly add several variations of one design. For example, maybe you just created an amazing design, but you want to add it to more items.
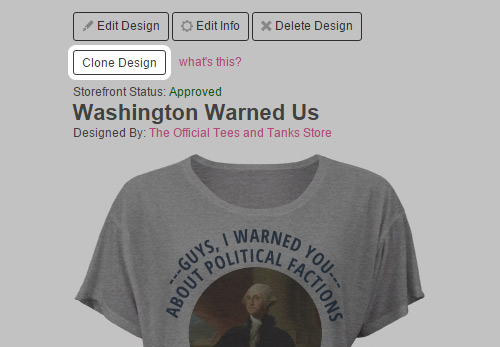 Just click the Clone button and a new design will automatically be created. It will have all the same details as the original design with two exceptions:
1. The share option will be set to "private".
Just click the Clone button and a new design will automatically be created. It will have all the same details as the original design with two exceptions:
1. The share option will be set to "private".2. The design name will be changed to "CLONE". Now, you can click Edit Design, make your edits (use the Swap Out Item tab to change items), and then click Save. Then click Edit Design Info. Add a new, unique design name, change up the design description, change your share option, and click Save.
 This saves time because the designs are similar, so they should probably be in the same categories and use similar tags. Now you can skip over those fields when adding the design info.
Note: this can be a great tool, but it is not meant to create exact copies of existing designs. Each design (and the corresponding design info) should be unique.
If you create duplicates and post them for sale, they will not be approved. If you do not edit the design info (meaning the design name still says CLONED), we can approve it for your store but not the gallery. However, we strongly recommend editing this info.
This saves time because the designs are similar, so they should probably be in the same categories and use similar tags. Now you can skip over those fields when adding the design info.
Note: this can be a great tool, but it is not meant to create exact copies of existing designs. Each design (and the corresponding design info) should be unique.
If you create duplicates and post them for sale, they will not be approved. If you do not edit the design info (meaning the design name still says CLONED), we can approve it for your store but not the gallery. However, we strongly recommend editing this info.
Can I add a specialty film or foil (metallic & glitter) to my design?
Yes! On many items! But not all items.
You can see which items are enabled with
metallic foil here. (Most of those allow for glitter too.)
Why do some items allow for specialty film and some don't? It all comes down to the decoration method. We have four methods:
- Direct-to-Garment Digital Ink Printing Without Pretreat
- Direct-to-Garment Digital Ink Printing With Pretreat
- Sublimation
- Film-only
- Our line of basic tees
- Neon tops
- Raglan tops
- Flowy tops
Can I use the Name & Number tab when creating a design?
If you are posting that design to your store, then the answer is no. Here is why: once you start using the Name & Number feature, all size and quantity inputs must be made inside that tab.
Think about that for a moment, because it's a little tricky. Within the Name & Number tab, you are essentially choosing a shirt for each individual person. So it is not compatible with the regular size & quantity fields, which means it's not really compatible with the add to cart button on the design details page.
Why was this design not approved?
Please check the email associated with your Customized Girl account! Whenever we mark a design as "not approved", we add an explanatory note, and that note is automatically emailed to you. If you had several designs marked as "not approved" at one time, you will get one email with all of those notes. (Sometimes we copy and paste the explanation into to each design's explanation field.)
In general, here are some reasons why we might not approve your design:
1. The most common reason, by far, is copyright. Please do not take images from the internet and upload them to your design. Whoever created that image, took that photograph, made that art, drew that illustration... they own the copyright. We cannot approve designs that include any of the following:
- celebrity faces
- pro sports teams
- universities
- brand logos
- band names
- recording artists
- album art
- movie and tv references
- disney
- book titles
- character names
- stock photo watermarks
- that cool art you found on tumblr
- pretty much anything that isn't your original, unique idea
I have added a design, and I see it on my store, but I don't see it in the public gallery?
When we first launched our storefront platform, we were rather flexible with designs that had a Share setting of "Storefront & Gallery". But eventually, we realized that our customers were getting confused when they came across certain types of designs. If the design had no name, if the centering was off, if it just seemed like a mistake had been made, then that design caused confusion.
We've begun to take a more curated approach to the gallery. If you're making great stuff, and if you're adding good names and descriptions, your designs will continue to show in the gallery if you wish.
If your designs create confusion for a customer browsing the gallery, we have to migrate those to a setting of "Storefront Only". This should raise the conversion rate for all designs, including yours that remain in the gallery.
You can still sell those designs through your store.
We have a lot more details about this. Please see this Gallery FAQ for more info.
We appreciate your understanding of these issues. If you have any questions, please email CGstores@eretailing.com.
Should I edit or customize my design?
If you click "edit design", you will edit that very design. After you make your edits in the design center, you will click save and it will take you back to that design details page.
If you click "customize", you are actually creating a new design. After customizing the design in the design center, you will click save and then you will be taken to the Save page where you will enter all the design info (name, description, etc.) because this is a new design.
How do I know if an image or concept is in the Public Domain?
So you're interested in the
public domain. Great!
We ask our store owners to please refrain from taking images from the internet. The one exception is the public domain.
Images enter into the Public Domain for several possible reasons:
- The copyright has expired. Pretty much all art created more than 100+ years ago is now in the public domain.
- The creator has officially released it to the public domain, usually with a license like a "Creative Commons License".
- It was originally created by the government. Now, this isn't true for all government images, but in theory, if the artwork was funded by public tax dollars, then the public usually owns the rights. Some photos of American politicians are in the public domain this way. Certain images from NASA are too.

How can I promote my designs on Social Media?
Hey, you are already on the right path! You recognize that promoting your storefront and your designs is a big key to your success.
As soon as you get done saving your design, you will find yourself on the design details page. (Visit this page any time by clicking on one of your designs.) Just below the Add to Cart button, you will see a variety of social media icons.
 You will see Facebook, Twitter, and Pinterest buttons. If you are already logged into any of those platforms in the same browser (maybe in a different tab), these buttons will be very easy to use.
Of course, you can also just copy the links to your designs and paste them into any of these sites as well. Usually they will automatically pull in your design image.
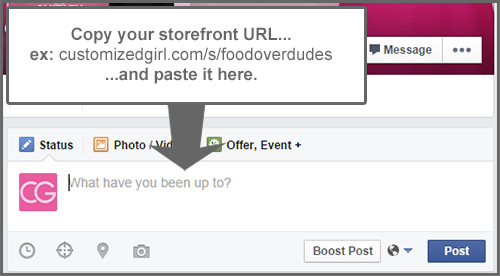
Below is an example of someone who wants to share their store on their own Facebook Fan Page or Organization Page or Personal Page.
You will see Facebook, Twitter, and Pinterest buttons. If you are already logged into any of those platforms in the same browser (maybe in a different tab), these buttons will be very easy to use.
Of course, you can also just copy the links to your designs and paste them into any of these sites as well. Usually they will automatically pull in your design image.
Below is an example of someone who wants to share their store on their own Facebook Fan Page or Organization Page or Personal Page.
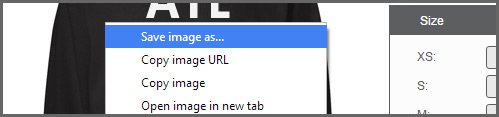
 If you want to upload your design image to these sites, that is fine too. Just go to your design details page and right click on the image you want. Then choose "save as" and save it to your device. Then go to any of these sites and upload the image that you have saved. Here is an example using the Google Chrome browser:
 Here is a list of social media and social shopping sites that might provide a good way to share your designs:


...and so on.
It's important not to spam any of these sites. Be a normal user. Recommend all the products you love. If you love your designs, recommend a few of those too.
Here are some examples of other store owners using social media in smart ways. (For even more examples, see our
Successful Stores FAQ.)
Facebook
Pink Runner Girl does an excellent job photographing her products and sharing them on her Facebook page in posts like this one and this one. Tumblr
Tees and Tanks turned a popular tumblr blog into a business by sprinkling some original, unique designs in with their fictional Photoshopped tops. YouTube
Internet Princess (aka Linn Moberg) creates brilliant, beautiful YouTube Videos and now she is using Customized Girl to launch her own fashion line. She announced her new line in a terrific tutorial video that also serves as a great how-to guide for Customized Girl storefronts. Follow our blog for some great articles about promoting your designs on social media. We've already posted the following: How to Market Your Storefront on Tumblr How to Market Your Storefront on Pinterest
How can I rank higher in Google search results?
1. Keywords.
When saving a design, you will see fields for Name and Description. You should describe your design using smart, relevant keywords. It's important to write clearly. Don't just stuff keywords into your descriptions.
The description should be readable and fun. Think about how someone might search for your design. What search terms might they use? Incorporate those terms into a nice, well-written description.
You do not need to describe the item. Please do not copy and paste the product details. That information will show up on the design details page too. Here are some good examples of well written descriptions. Just check out the "Design Details" sections:
Snacks Over Jacks T-Shirt
LOL Stabbed in the Head T-Shirt
Let's Get Illuminaughty Tank Top
See below for another example!
2. Links.
As much as you can, link back to your storefront and your designs. If you have a blog or a website, write about your designs and link back to them. The more incoming links your design pages have, the higher they will rank in organic search. But be careful. Don't spam people and don't add a bunch of unnecessary links in odd places. Your links, just like your design names and descriptions, should be natural.
3. Social Media.
More and more, it seems like Google is using the popularity of pages within social media (Facebook, Twitter, Instagram, Google+, etc...) to help determine rankings. It makes sense. These social media sites give a strong indicator of how much people are talking about a page and how popular it is.
You can promote your designs on these sites (check out our
Social Media FAQ
for more helpful info) but don't spam them. Ultimately, it's all about creating a terrific design that people will genuinely want to share. Maybe you can kickstart the process by sharing it to your own friends and fans first, but it's always smart to start with a really terrific concept.
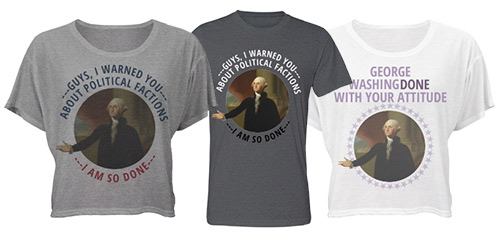
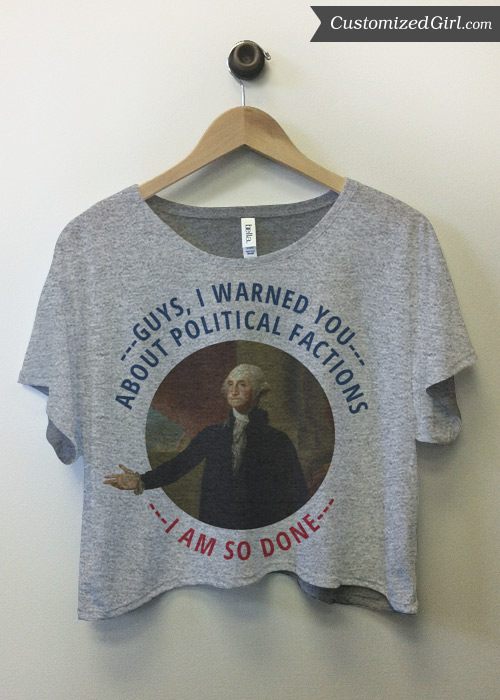 Want to see how this designer named and tagged this design? Then check out the design details section for this
George Washington's Warning T-Shirt. See what we did there? We used quality "anchor text" when linking to this specific design. We're basically telling search engines "Hey, this design relates to a t-shirt with a graphic of George Washington giving a warning. If you user is searching for those keywords, this page might be a good result."
One more thing. You might look at this design and say "How can we approve it? It has a painting that someone else painted. Isn't that a copyright violation?" For recent artwork, the answer would be yes. But this is a very old painting, and it is now in the
public domain. Anyone can remix it, mash it up, and make something new. (A good rule of thumb: if the work is 100+ years old, it's probably in the public domain.)
Want to see how this designer named and tagged this design? Then check out the design details section for this
George Washington's Warning T-Shirt. See what we did there? We used quality "anchor text" when linking to this specific design. We're basically telling search engines "Hey, this design relates to a t-shirt with a graphic of George Washington giving a warning. If you user is searching for those keywords, this page might be a good result."
One more thing. You might look at this design and say "How can we approve it? It has a painting that someone else painted. Isn't that a copyright violation?" For recent artwork, the answer would be yes. But this is a very old painting, and it is now in the
public domain. Anyone can remix it, mash it up, and make something new. (A good rule of thumb: if the work is 100+ years old, it's probably in the public domain.)
What are successful stores are doing?
Here are some different ways to think about your marketing your store:
Build an audience.
Pink Runner Girl
is an excellent example of a store owner who is really building her audience. She started with a blog about running and health and then started growing her
Facebook page. She now has over 6,000 fans following her on Facebook.
Because she has a loyal, engaged audience who really loves her stuff, she can publish Facebook posts like
this one
and
this one, and you can get a feel for the excitement from her fans in the comments.

Jump on the trends.
Rex Lambo
builds his audience by making original, beautiful designs that feature the latest graphic trends. Some are funny, some are edgy, but they are all very well executed.
He also does a great job of promoting his designs on Wanelo
where he has almost 10,000 followers.

Find a niche.
This Mom Means Business
has a store name that says it all. She is a mom and she really does mean business. Specifically, she's in the mom business. She makes amazing designs for moms of athletes. Most of her designs are customizable. Her customers can add their own child's name or jersey number.
Customized Girl is part of the eRetailing family of sites. One of our sister sites is
Bridal Party Tees. It's unique because it is a custom apparel site (all the designs are personalizable) that focuses on a very narrow niche - bridal and bachelorette parties.
If you think about it, TMMB has essentially created her own version of Bridal Party Tees, but aimed at Sports Moms. She has her own custom apparel business focused, smartly, on a specific niche.

Take great photos.
When you are promoting your designs on the internet, it always helps to have amazing photography. We have a lot of store owners taking great pics and video
(see more examples here)
, but we especially wanted to congratulate the
Get to Know brand
for their excellent photography.
First of all, they take great pics. Nice composition.
Secondly, they use a cool filter. It creates a mood. You get a feel for the atmosphere.
And thirdly, they use them smartly. They have a
"shop" page
on their site, which links to their storefront. These big, beautiful pictures are on a loop, making up the entire background of the page. Nice work.


Should I include my logo in each of my designs?
Probably not.
But it is a really good question. The instinct to add your logo to every single design does make sense. For example, it would help spread brand awareness, right?
If you are selling designs to promote your own fitness studio, then yes, it would make sense to include your logo on each design.
Even if you are designing funny fitness tank tops, it still might make sense to include your studio's logo on the back or maybe under the funny phrase.
But what if you're trying to kickstart your own fashion line? What if your new brand is independent from any existing business? Does it still make sense to always include a logo?
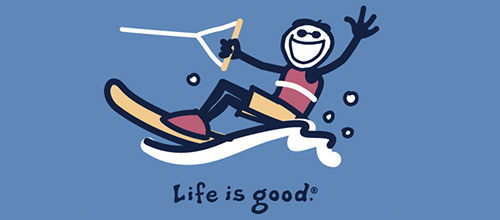
Well, let's look at the quintessential t-shirt brand that always includes their logo: Life is Good.
Can I see more data about my storefront?
Yes! Just go to My Account > Selling Tools. You will see an option to integrate your storefront with Google Analytics. This will help you see more data like which traffic sources are providing the most visits and which of your designs gets the most traffic.
Here is how it works:
- Create a new account with Google Analytics. This is totally free.
- You'll be asked to add an account name and website name. You can enter whatever you want into these fields.
- In the Website URL field, add http://www.customizedgirl.com. Do not include your store URL. This is important.
- Then click "Get Tracking ID".
- Copy that tracking ID. Go to My Account > Selling Tools. Paste the tracking ID into that field.
- That's it!
Can I embed my designs so that they display on my own website?
Yes!
Go to your storefront and choose
Selling Tools.
You will see a section of code that you can copy and then paste into your own website.
Customers will be able to browse your designs on your own site. Clicking a design will take them to that design on Customized Girl. From there, they will be able to complete checkout.
This code will display up to 1,000 designs on your site. It is responsive, so it should look great on phones, tablets, and laptops. Whatever changes you make in your design gallery on Customized Girl will be automatically reflected on your website.
Can I see what the Customized Girl marketing team is doing?
Yes! Subscribe to our newsletter! Read our
blog! Follow our social media accounts! Join us!
Seriously, it's pretty easy to see what we're doing. Just check out all the Social Media icons and links in our footer. At the bottom of each page, you'll also see the sign up section for our email newsletters.
Each icon below links to a different account!